Spider Mites: Natural Prevention and Treatment
Spot and eliminate spider mites (Tetranychus urticae) on houseplants. Showering, Castile soap, neem oil and humidity-based prevention that actually works.
By SPRAIA editorial team · Method: botanical sources, field feedback and editorial validation
Summer is the spider mite’s favourite season. As soon as the heat rises and the air in your home turns dry, these tiny pests — properly known as Tetranychus urticae, the two-spotted spider mite — literally explode in numbers within a few days. The problem? They are so small (under 0.5 mm) that you often notice them only once the damage is already visible: leaves fading and stippled with yellow dots, then scorching, and suspicious fine webbing between the stems. The good news is that with early detection and the right natural reflexes, you can beat them without harsh chemicals. Here is how to recognise spider mites, understand why they thrive, and above all how to get rid of them for good.
What exactly is a spider mite?
Despite the name, a spider mite is not a spider but an arachnid mite, a distant cousin of ticks. Several species exist, but the most common on houseplants is Tetranychus urticae, the two-spotted spider mite.
What does it look like?
- Size: 0.3 to 0.5 mm, barely visible to the naked eye. They look like tiny moving dots.
- Colour: yellow-green to orange when active, turning brick-red late in the season or before overwintering.
- Location: almost always on the undersides of leaves, along the veins, where they pierce the cells to feed on sap.
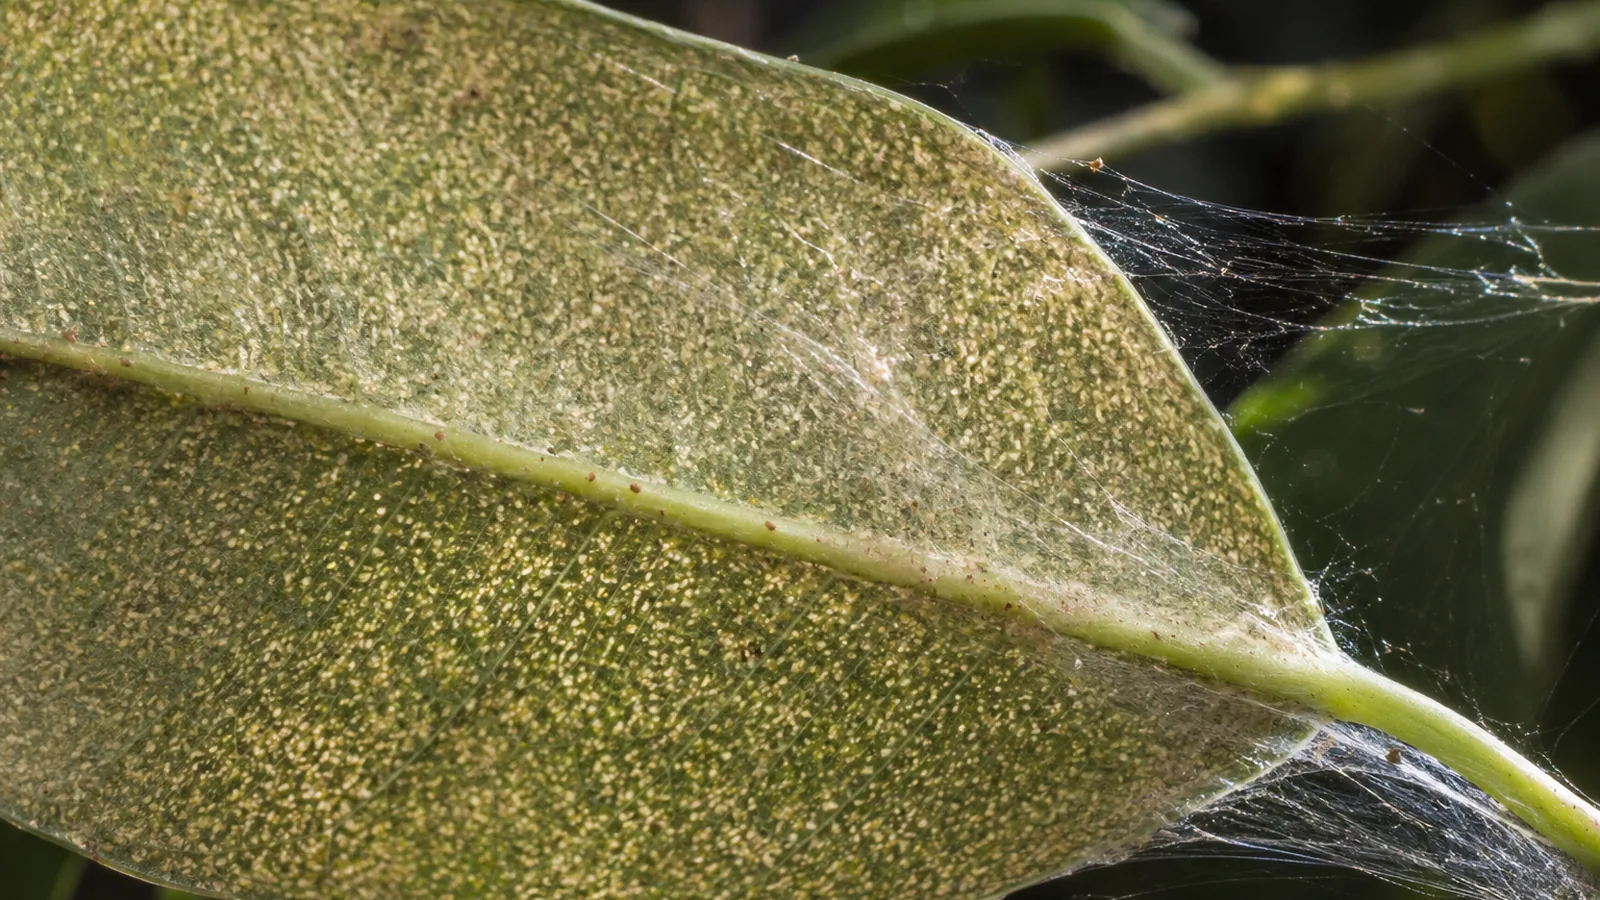
- Telltale sign: the fine silky webbing they spin between leaves and stems during heavy infestations. This is often the first visible clue.
To spot them before the webbing appears, try this trick: hold a sheet of white paper under a suspect leaf and shake gently. If tiny dots start running across the paper, you have your answer.
A lightning-fast life cycle
This is what makes spider mites so dangerous. At 20°C, their full cycle (egg to adult) takes about 14 days. But at 30°C, it shrinks to just 5-7 days. A single female lays up to 100 eggs in her lifetime. The result: during a heatwave, a population can be multiplied by 10 in a single week. That is why an infestation seems to appear from nowhere and become critical within days.
Recognising the signs of an infestation
Spider mites do not chew leaves: they pierce the cells and suck out the contents. Each puncture leaves a tiny pale spot. Here are the symptoms, in order of appearance:
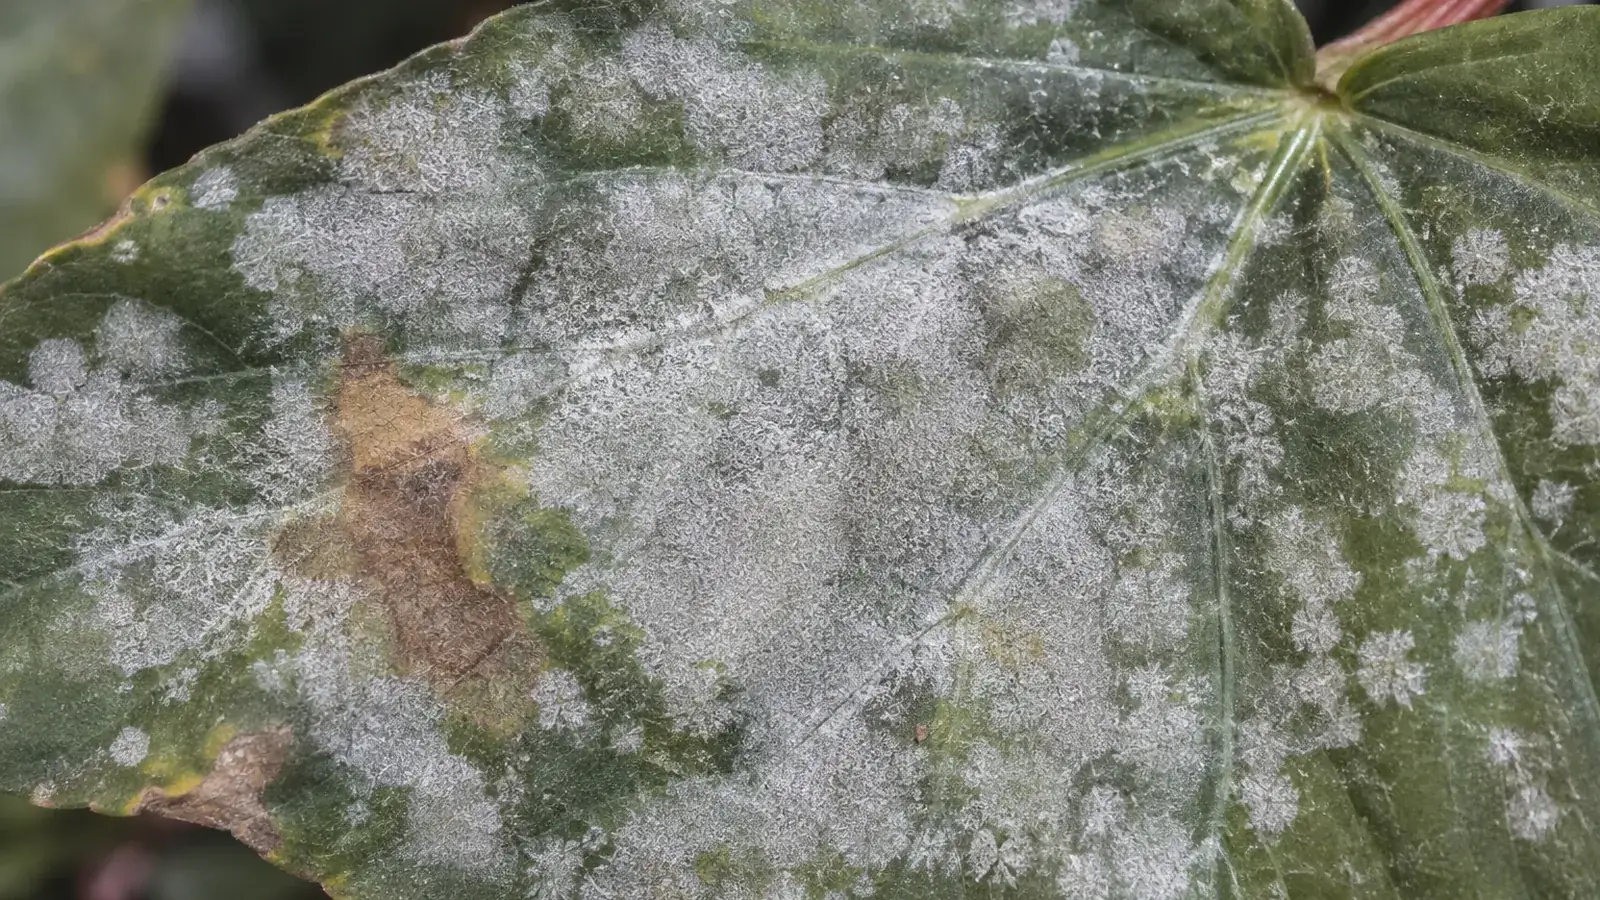
- Yellow or whitish stippling — a fine speckling on the tops of leaves, like powdery sand. This is the first sign.
- Faded leaves — the overall look turns dull, grey-silver or bronze, as if bleached.
- Fine webbing — between stems, at leaf axils, on new growth. By this stage the infestation is already advanced.
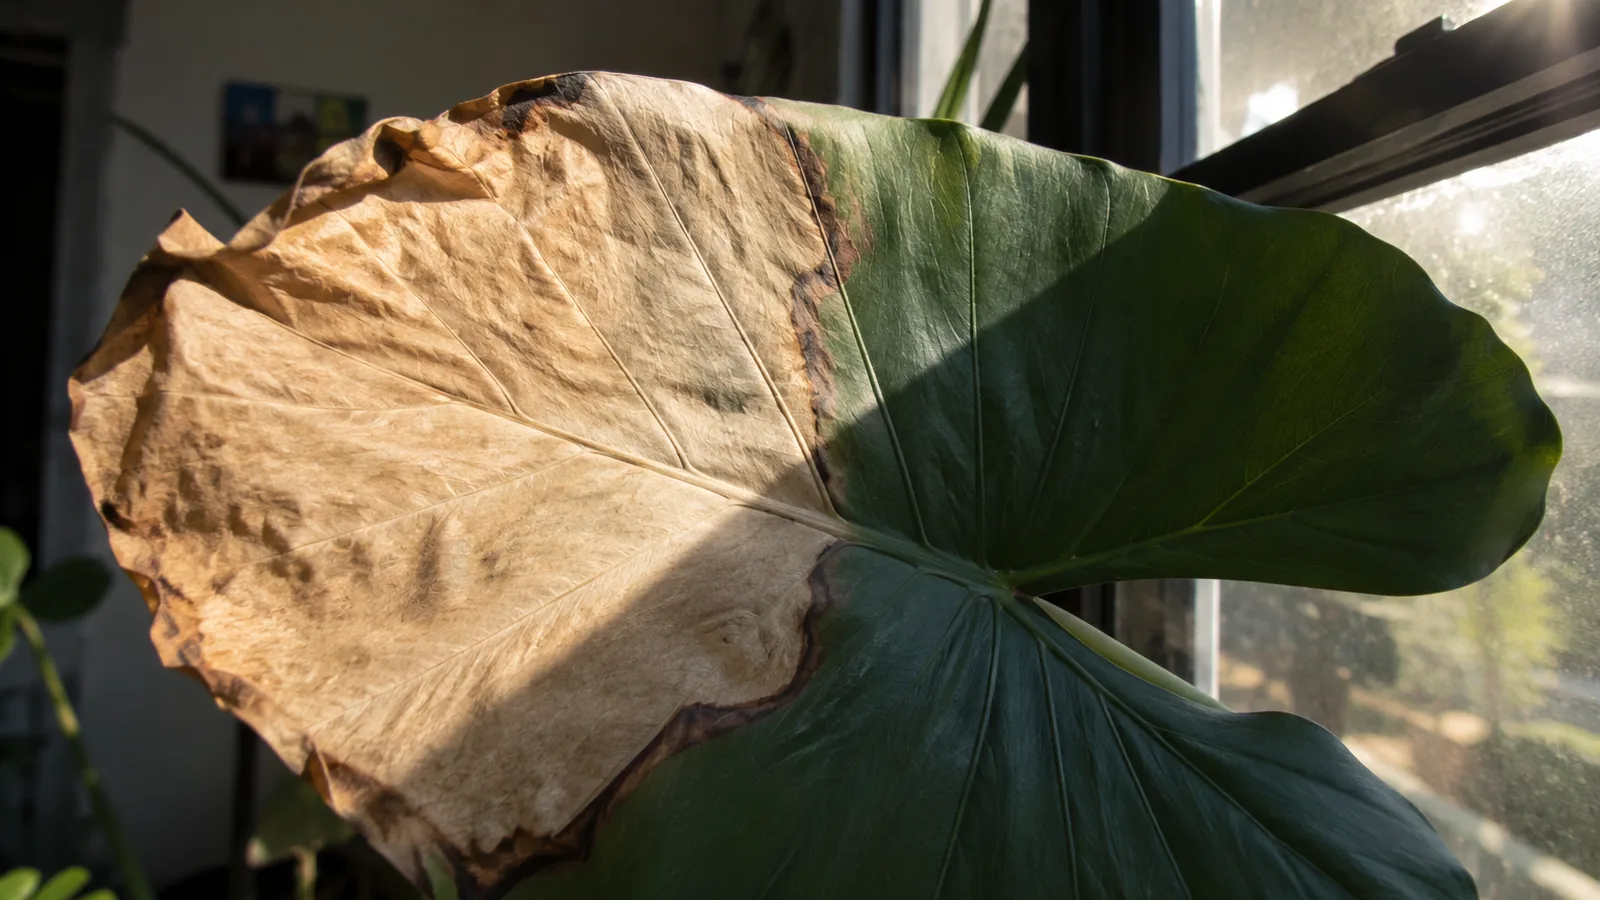
- Scorching leaves — dry edges, brittle foliage, premature drop.
- Stunted growth — the plant weakens, new shoots are puny.
The yellow stippling is sometimes mistaken for a deficiency or a light problem: our guides on yellow leaves and their causes and on indoor plant light will help you rule out false leads. But if the stippling comes with webbing and moving dots on the leaf undersides, there is no doubt: these are spider mites.
SPRAIA tip: at the slightest doubt, photograph the underside of an affected leaf with the app. Photo diagnosis distinguishes a spider mite attack from a deficiency, light burn or another pest in seconds — a precious time saver when every day counts.
Why heat and dry air favour them
Understanding the mite’s ecology is already half the battle. Two factors drive their proliferation: temperature and air humidity.
Heat accelerates their reproduction
As we saw, the life cycle speed nearly doubles between 20 and 30°C. An overheated flat in summer, a conservatory, a south-facing windowsill: all these micro-climates at 28-35°C let spider mites multiply at breakneck speed.
Dry air is their best ally
Spider mites love dry air (relative humidity below 50%) and hate high humidity. Ambient air below 40% humidity — typical of heated or air-conditioned interiors — creates ideal conditions for them. Conversely, humidity above 60% strongly slows their reproduction and hampers their movement.
This is the key to the whole strategy: raising ambient humidity is both a preventive measure and a treatment weapon. Where a mealybug shrugs off humidity levels, the spider mite is extremely sensitive to them.
The most affected plants
Some plants are true spider mite magnets, especially those with fine foliage or sitting in hot, dry spots:
- Indoor palms (Areca, Kentia, Dypsis) — target number one
- Ficus (especially benjamina), whose thin leaves are easily pierced
- Calathea, Maranta, Ctenanthe — fine foliage, very sensitive (these plants already demand high humidity)
- Dracaena, Yucca and other long-leaved plants
- Indoor roses, hibiscus, citrus
- Herbs and young seedlings
If you grow several of these near a sunny window, be extra vigilant as soon as the heat arrives.
Prevention: cutting spider mites off at the source
The best defence is prevention. Here are the habits that make your home inhospitable to spider mites.
- Keep humidity at 50-60% — mist regularly, group your plants, set out trays of damp clay pebbles, or use a humidifier during heating season or heatwaves.
- Shower the foliage every 10-15 days — a jet of lukewarm water, aimed under the leaves, mechanically dislodges mites and eggs before a colony sets in.
- Inspect leaf undersides weekly in summer — that is where it all starts. The white paper test (see above) takes ten seconds.
- Keep sensitive plants away from dry heat sources — radiators, air-con vents, full south sun without a sheer curtain.
- Quarantine for 3 weeks any new plant before adding it to your collection. Spider mites often travel in on shop-bought plants.
- Clean and ventilate — clean foliage and fresh air slow colony establishment.
SPRAIA tip: turn on inspection and shower reminders in the app. A weekly photo check of the leaf undersides in summer is often enough to catch an emerging attack while it is still easy to stop.
Natural treatment: beating spider mites
If the infestation is already here, don’t panic. Spider mites respond very well to gentle methods, provided you are consistent and treat the undersides of leaves, where they hide.
Step 1: the mechanical shower
This is the first reflex and it is remarkably effective. A powerful jet of lukewarm water, aimed under the leaves, dislodges a large share of the mites and their eggs. Repeat every 2-3 days. For small plants, dunking the top growth (pot protected by a bag) works very well.
The shower alone, combined with a rise in ambient humidity, is sometimes enough to stop a light infestation. It is also a zero-toxicity treatment, ideal if you have children or pets.
Step 2: Castile soap
Castile (or black) soap works by smothering: it clogs the mites’ breathing passages. It is an essential ally, already recommended in our thrips guide and our mealybug guide.
Recipe:
- 1 tablespoon of genuine liquid Castile soap
- 1 litre of lukewarm water
Application:
- Mix until fully dissolved.
- Spray generously, focusing on the undersides of leaves and the veins.
- Leave on for 1 to 2 hours, then rinse with clean water.
- Repeat every 3 days for 3 weeks, to cover several generations of eggs.
Step 3: neem oil
Neem oil disrupts the mites’ hormonal cycle and prevents larvae from developing. It also offers a residual repellent effect lasting several days.
Recipe:
- 5 ml of pure cold-pressed neem oil
- 1 litre of lukewarm water
- 2-3 drops of liquid soap as an emulsifier
Application:
- Mix vigorously (oil and water separate naturally).
- Spray in the evening — neem oil degrades in direct light and can scorch foliage in the sun.
- Cover the whole plant, tops and especially undersides.
- Repeat every week for 4 to 6 weeks.
Step 4: natural predators (biological control)
For large collections or recurring infestations, predatory mites are an elegant, lasting solution. The champion is Phytoseiulus persimilis, a mite that feeds exclusively on spider mites: a single one devours dozens of eggs and adults per day. You order them live from suppliers specialising in biological control.
Conditions for success:
- Temperature of 20 to 30°C and humidity above 60% — which doubly penalises the spider mites.
- Do not use insecticide or neem at the same time (it would kill the predators too).
- Ideal for conservatories, greenhouses and large collections.
Other beneficials such as Amblyseius californicus tolerate dry conditions better and can serve as prevention.
Preventing reinfestation
Wiping out a colony is good; stopping it coming back is better. Spider mites leave eggs that hatch in successive waves, which is why persistence matters.
- Keep treating for 2-3 weeks after the last mite seen — hidden eggs hatch out of step.
- Treat all neighbouring plants, even those that look healthy: mites spread from one leaf to another by simple contact.
- Keep humidity durably above 55% in summer. This is your best anti-relapse insurance.
- Clean the pot, saucer and windowsill — eggs can survive there.
- Reintroduce the treated plant to the collection only after 2 weeks with no new symptoms.
A plant weakened by water stress is more vulnerable. Well-managed watering and a stable environment strengthen its natural defences. And if fungus gnats invite themselves into the substrate along the way, our fungus gnat guide will round out your summer arsenal.
Frequently asked questions about spider mites
The questions that come up most as soon as these mites appear in summer.
- Look under the leaves: spider mites leave a fine yellow or whitish stippling on top, and tiny moving dots with fine webbing underneath. A deficiency gives broader, more uniform yellow areas, with no webbing or moving dots. The white paper test (shaking a leaf over it) confirms quickly: if dots run across the paper, they are spider mites.
- Because heat and dry air speed up their reproduction. At 30°C their cycle drops to 5-7 days versus 14 days at 20°C, and air below 50% humidity is ideal for them. Heated or air-conditioned interiors, south-facing sills and conservatories combine all these conditions, hence the summer population explosions.
- It doesn't kill them directly, but it strongly curbs their reproduction and movement. Above 60% relative humidity, spider mites struggle to proliferate. Misting, grouping plants, using a humidifier and showering the foliage regularly is therefore both a prevention and a genuine treatment lever.
- Allow 3 to 4 weeks of consistent treatment. Showering and Castile soap every 3 days quickly reduce the population, but eggs hatch in several waves, so you must repeat to cover the whole cycle. Continue for another 2-3 weeks after the last visible mite to avoid a relapse.
- Yes, it is one of the most reliable natural treatments. Neem disrupts the mites' hormonal cycle, stops larvae developing and offers a residual repellent effect for several days. Always spray in the evening and under the leaves, never in full sun to avoid burns, and repeat weekly for 4 to 6 weeks.
Conclusion
Spider mites are formidable summer opportunists, able to colonise a plant within days thanks to heat and dry air. But their Achilles heel is precisely what attracts them: they hate humidity. By keeping the air at 55-60%, showering the foliage regularly and watching the undersides of leaves, you keep them at bay. And if the infestation is already here, the shower + Castile soap + neem oil combination, applied consistently, beats it without toxic products.
The key remains early detection. The sooner you act, the simpler the treatment. With SPRAIA, an instant photo diagnosis confirms the pest’s identity, reminders calibrate your showers and treatments, and the growth journal lets you follow your plants back to health. Your favourite plant babies deserve a peaceful summer.